How to Choose Screw Diameter and Shot Size for an Injection Molding Machine
Abstract:
Choosing screw diameter and shot size begins with real part data: part weight, cavities, runner, material density and cycle target. Keeping shot use in a practical capacity range and checking 1D–3D screw travel helps buyers reduce defects, protect material quality and match the right injection molding machine.
Choosing an injection molding machine is not only about clamping force. For many buyers, the real production problems start when the injection unit is not matched correctly: the part cannot fill consistently, the melt stays too long in the barrel, cycle time becomes unstable, or the machine consumes more energy than expected.
Two parameters deserve close attention before you confirm a machine configuration: screw diameter and shot size. Together, they determine how much plastic the machine can inject, how much pressure is available, how stable the melt is, and whether the machine can support your target cycle time.
A practical starting point is simple: calculate the total material needed for one cycle, add a safety margin, convert the weight into volume by material density, and check whether that shot falls within a suitable range of the machine’s barrel capacity. In many applications, keeping the actual shot within about 20%–80% of maximum capacity is used as a practical sizing range, while 30%–80% is often preferred for a more stable production window.
Quick Answer: What Is the Right Shot Size Range?
For most injection molding applications, the required shot size should not be too close to either end of the machine’s maximum injection capacity.
If the required shot is too small, the material may remain in the barrel for too long. This can increase the risk of discoloration, burning, black specks, or polymer degradation, especially for heat-sensitive engineering plastics.
If the required shot is too large, the machine has little process margin. The screw may need a long stroke, recovery time may increase, and filling stability can become harder to control.
A good buyer’s rule is: Required Shot Weight = (Part Weight × Number of Cavities + Runner/Sprue Weight) × 1.10
The 10% margin is not a universal law, but it is a useful first estimate for cushion, process variation, and practical production allowance.
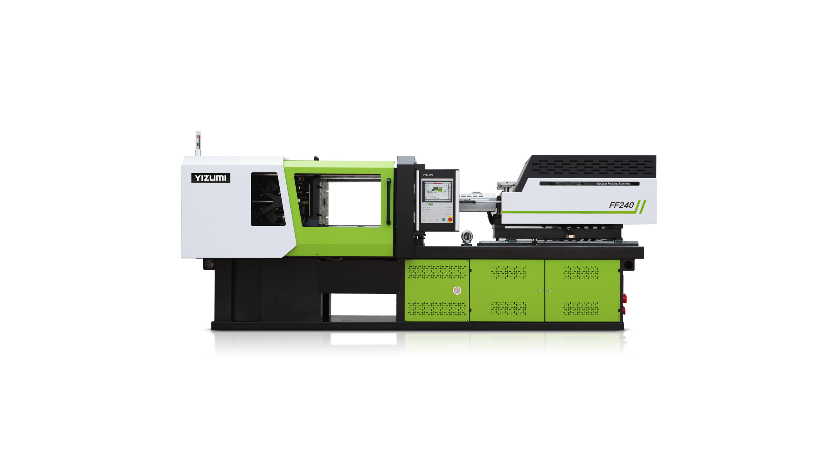
FF-N Series Electric Injection Molding Machine
Calculate the Total Shot Weight
Start from the actual molded product, not from the machine catalog. You need four pieces of information:
| Data Needed | Why It Matters |
| Single part weight | Base material demand |
| Number of cavities | Multiplies shot demand |
| Runner and sprue weight | Often forgotten in cold runner molds |
| Cushion or safety margin | Helps maintain stable injection and packing |
Formula: Total Shot Weight = Part Weight × Number of Cavities + Runner/Sprue Weight
Then add a safety margin: Target Shot Weight = Total Shot Weight × 1.10
Convert Shot Weight into Shot Volume
Machine specifications may list injection capacity in grams, ounces, or cubic centimeters. Many catalogs also use PS-equivalent shot weight. That can be misleading because PP, ABS, PA, PC, POM, PET, and PVC do not have the same melt density.
Use this formula: Shot Volume = Target Shot Weight ÷ Material Melt Density
This volume is what you should compare with the machine’s injection capacity. For buyers, this is one of the most important steps because the same machine can deliver different shot weights depending on the resin.
Apply the Barrel Capacity Rule
Once you know the required shot volume, compare it with the maximum barrel capacity of the machine.
Shot Utilization = Required Shot Volume ÷ Machine Shot Capacity × 100%
A practical sizing target is usually:
| Shot Utilization | What It Means | Buyer Risk |
| Below 20% | Barrel is likely oversized | Long residence time, degradation risk, poor color change efficiency |
| 30%–80% | Preferred practical range | Better balance of stability, margin, and repeatability |
| Above 80% | Injection unit may be too small | Short shot risk, limited cushion, longer recovery, unstable production |
Check the 1D to 3D Screw Stroke Rule
Shot size alone is not enough. The screw diameter must also match the required shot.
A widely used engineering check is the 1D to 3D screw stroke rule. This means the screw should normally travel forward about 1 to 3 times its own diameter during injection.
For example:
· If the screw diameter is 40 mm, a practical injection stroke may be around 40–120 mm.
· If the required stroke is less than 1D, the screw may be too large.
· If the required stroke is more than 3D, the screw may be too small.
Why does this matter?
A screw that is too large may create poor metering resolution and longer material residence time. A screw that is too small may require excessive stroke, higher shear, longer recovery, and may not provide enough shot volume for stable production.
The best choice is not always the largest screw. It is the screw that gives enough shot capacity while maintaining pressure, melt quality, recovery speed, and process stability.
Understand the Screw Diameter Trade-Off
Screw diameter changes the behavior of the injection unit.
| Screw Diameter Choice | Advantages | Possible Risks | Better For |
| Smaller screw | Higher injection pressure, better dosing accuracy | Limited shot capacity, possible longer recovery | Precision parts, thin-wall parts, high-viscosity resin |
| Medium screw | Balanced capacity and pressure | May not suit extreme applications | General-purpose molding |
| Larger screw | Higher shot capacity and plasticizing output | Lower available pressure, longer residence time | Large parts, thick-wall parts, multi-cavity molds |
For a buyer, the decision should start with the product and mold, not the machine frame size. A thin-wall packaging part may need high speed and fast recovery. A precision medical component may need repeatable shot control and clean production. A large automotive part may need a bigger shot volume, mold space, and stable clamping structure.
Consider Material Behavior
Different plastics react differently to heat, shear, and residence time.
For heat-sensitive materials, an oversized barrel may create unnecessary thermal history. For glass-fiber-reinforced materials, wear resistance of the screw and barrel becomes important. For high-viscosity engineering materials, the machine may need more injection pressure instead of simply more shot capacity.
Before finalizing the screw diameter, check:
· Material type and melt density
· Glass fiber or filler content
· Heat sensitivity
· Required melt temperature
· Target cycle time
· Required recovery time
· Product wall thickness and flow length
If the screw cannot recover before the cooling stage ends, the machine may slow down the entire cycle. If the material stays in the barrel for too long, quality issues may appear even when the machine seems large enough on paper.
Application-Based Selection Tips
Thin-Wall Packaging
For thin-wall containers, lids, and packaging parts, buyers usually care about fast filling, short cycle time, mold opening/closing speed, and plasticizing capacity. YIZUMI P Series High-speed Injection Molding Machines are designed for multi-cavity thin-wall packaging, with clamping forces from 2,500 to 5,500 kN. The series also improves mold opening/closing operating speed by 15%–20%, supporting high-efficiency production needs.
General-Purpose and Precision Molding
For general consumer products, 3C components, household goods, and precision parts, the machine should balance injection stability, energy efficiency, and repeatability. YIZUMI A6 Series covers 900–10,000 kN clamping force and uses intelligent clamping force management. Its dual pressure-center platen design reduces platen deformation by 10%–25%, and intelligent weight V/P control reaches product weight repeatability of 2‰.
Medical and Clean Production
Medical parts often require cleaner mold areas, stable injection pressure, and consistent part weight. YIZUMI FF-M Series is designed for medical applications with 1,600–3,800 kN clamping force, clean room suitability, and injection pressure/holding pressure stability up to ±0.1 MPa. Its medical-use high-mixing screw can improve plasticizing efficiency by more than 20% compared with a general screw for common materials such as PP and PS.
Large Parts and Automotive Applications
For large automotive, appliance, or structural parts, buyers should look beyond shot size and check mold space, platen rigidity, opening stroke, and clamping structure. YIZUMI DP Series Two-platen Injection Molding Machines support diverse processes such as injection compression molding, microcellular foaming, long glass fiber molding, and multi-material applications, with clamping forces from 550 to 4,000 tons.
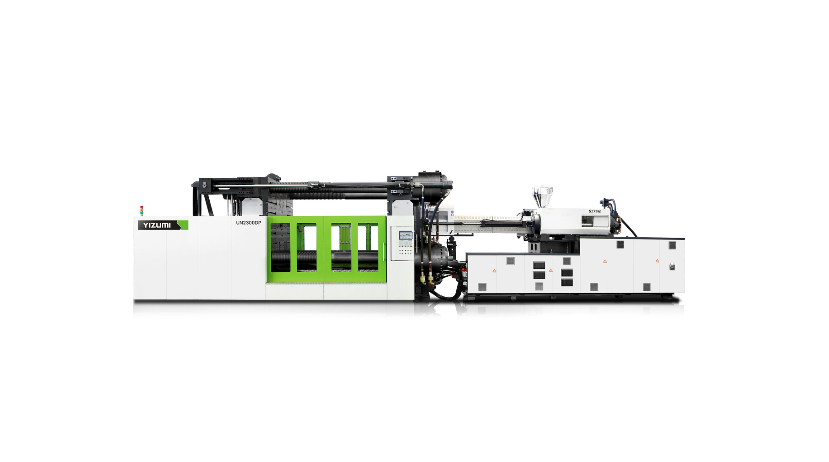
DP Series Two-platen Injection Molding Machine
Common Mistakes Buyers Should Avoid
Mistake 1: Selecting only by clamping force
Clamping force keeps the mold closed, but it does not guarantee the injection unit can deliver the right shot volume, pressure, or plasticizing performance.
Mistake 2: Choosing the largest screw for flexibility
A larger screw may increase capacity, but it can reduce pressure and increase residence time. This can hurt quality for small shots or heat-sensitive materials.
Mistake 3: Ignoring runner weight
Cold runners can add a meaningful amount of material per cycle. If you only calculate product weight, the selected injection unit may be too small.
Mistake 4: Using PS-equivalent capacity without conversion
Always convert by actual material density before comparing your required shot with the machine specification.
Mistake 5: Forgetting recovery time
A machine that can inject the shot may still be too slow if plasticizing cannot finish within the target cycle.
Data to Prepare Before Asking for a Recommendation
To receive an accurate injection molding machine recommendation, prepare:
· Product drawing or 3D file
· Part weight and dimensions
· Number of cavities
· Runner type and runner weight
· Plastic material and density
· Wall thickness and flow length
· Projected area
· Mold size and mold thickness
· Target cycle time
· Annual or monthly production volume
· Quality requirements, such as tolerance, surface finish, or clean room needs
YIZUMI’s service process includes process and mold analysis, raw material selection, product design support, mold flow analysis, equipment selection suggestions, whole plant planning, delivery solutions, training, preventive maintenance, and device upgrades.
Conclusion
Choosing the right screw diameter and shot size starts with your part, not the machine catalog. Calculate the full shot weight, including cavities, runner and cushion, convert it by material density, then keep the result within a practical barrel-capacity range. Finally, check whether the screw stroke sits around 1D to 3D. This approach helps avoid short shots, material degradation, slow recovery and unstable cycles, while giving buyers a clearer basis for selecting the right injection molding machine.